Post Form
There are 3 sections on the new Post Disbursements form, which is similar to the original Post Disbursements form on eQx.
Header

The header of the form is pre-filled as shown in the screenshot. The Post Disbursements form can only be submitted when the following criteria are met:
- At least one expense has been added (either Expense or Firm Expense)
- Batch Proof Amount must be zero
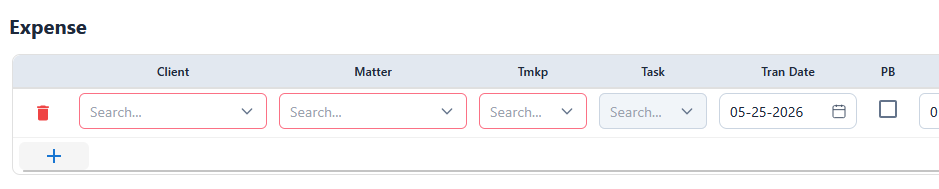
Expense

Above is the Expense section. You can add a new record by clicking the plus button.

A new expense record will be added in the state shown above. Due to the number of fields in an Expense record, you may need to scroll horizontally to see the full row, depending on your screen size.
Fields on an Expense record can be filled in normally. Auto-fill and tab flow are carried over from the original eQx application for users already accustomed to tab navigation.
Expense Tax Breakdown
Some Tax Groups, when selected, will allow you to enter detailed tax information.

In this example, the Tax Group BOTH is selected. To enter the Tax Detail, navigate to the end of the row, where the Expense Tax button is located. You can modify the amount for each Tax Type row, and the total tax amount will update accordingly.
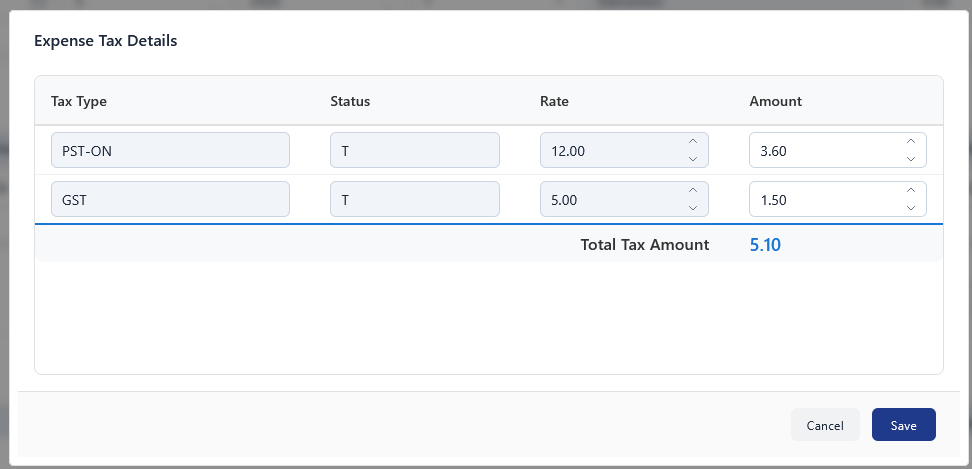
Click Save, and the Tax Amount field on the record will be updated as well.
Firm Expense

Similar to the Expense section, you can add a new Firm Expense record using the plus button. Many fields will be auto-filled for you.
Firm Expense Tax Breakdown
This feature works exactly the same as the one in the Expense section.
Validations and Submission

Validations have been implemented for the redesigned forms on eQ+. For Post Disbursements, a validation summary appears at the top of the form after a submission attempt if any fields contain issues.
Fields with issues are also highlighted with a red border. Resolving an issue will automatically remove the red border from that field.
After resolving all flagged fields, click Submit again. A successful submission will display a toast message with the following content.
