Maintain Office Tax Groups
The Maintain Office Tax Groups routine allows the user to assign Tax Groups to Firm Offices. Tax Groups are established through the Maintain Tax Groups routine, and Offices are established through the Maintain Offices routine. This routine should be used with caution, as it will affect all Billing amounts and procedures.
When the Maintain Office Tax Groups routine is accessed from the eQuinox main menu, the screen shown below will be displayed.
Field Definition
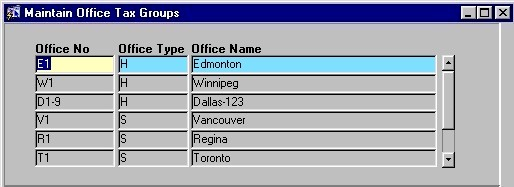
In the screen section displayed above, the user is presented with the number, type, and name of every office within the Firm. To edit this information or to add a new office to the list, the user must make the changes or additions in the Maintain Offices form.
Office No - The identifying Office Number or Code. Office numbers are a maximum of 10 characters.
Office Type - The type of Office (i.e. Head Office, Subsidiary Office, etc).
Office Name - The name of the Office. Offices are generally named after their location, allowing for easy identification.
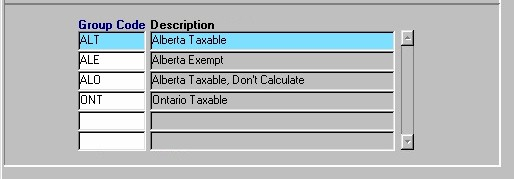
The section of the form seen directly above houses details specific to the Office selected in the first section of the form. For example, in the Edmonton office (shown at the top in blue), the assigned Tax Groups are "ALT", "ALE", "ALO" and "ONT".
Group Code - The code assigned to the Tax Group (the Tax Group's unique identifier). When assigning Tax Groups to Offices, the user may make a selection from the List of Values provided. Once a selection is made, the Description will also be displayed.
Note: The Tax Groups that are included in this list are those created in the Maintain Tax Groups form. To edit Tax Group information or to add a new Tax Group to this list, the user make the changes or additions in the Maintain Tax Groups form.
Description - A description of the Tax Group. This is automatically displayed when the user makes a selection in the previous field.
Once the user has finished entering or updating information, they must click the Save button or press F10 to commit the changes to the database.