Dye & Durham Auto AP
- Section for Video demonstration
Instructions
Note: Currently the uploader only works for Dye & Durham invoices. We are working hard to add more templates to this uploader. Stayed tuned!
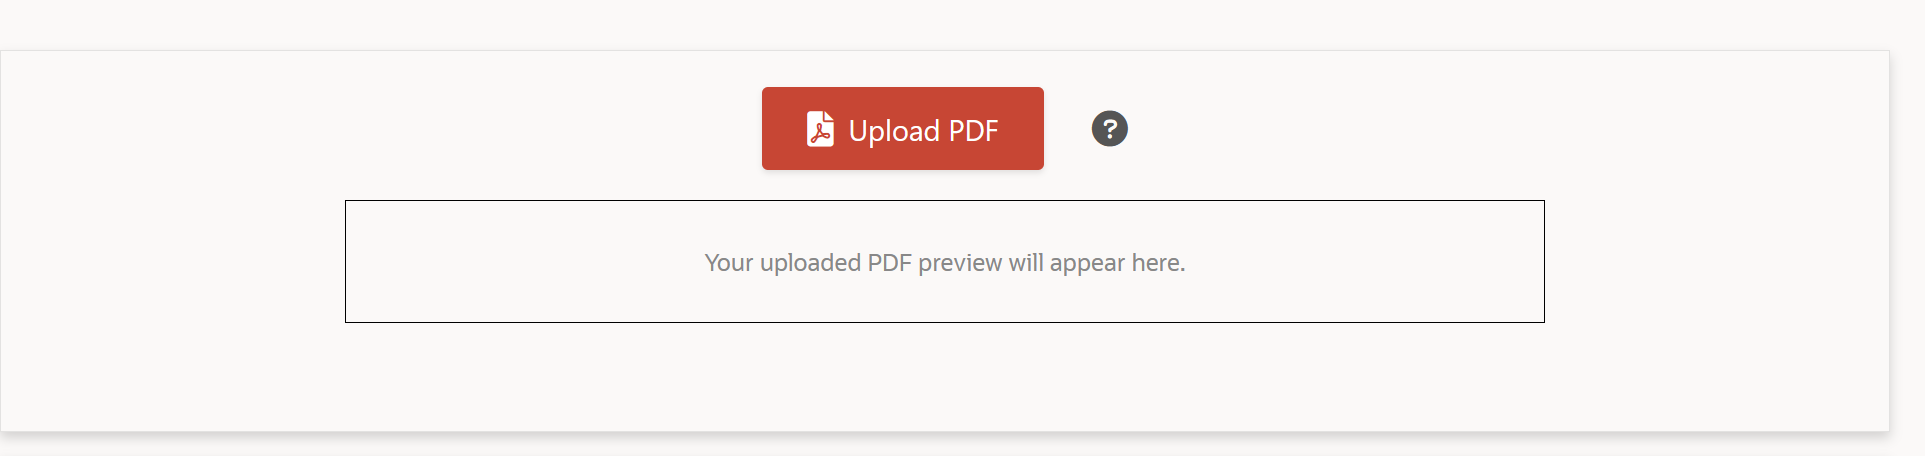
- Click on the red "Upload PDF" button and select the relevant invoice.
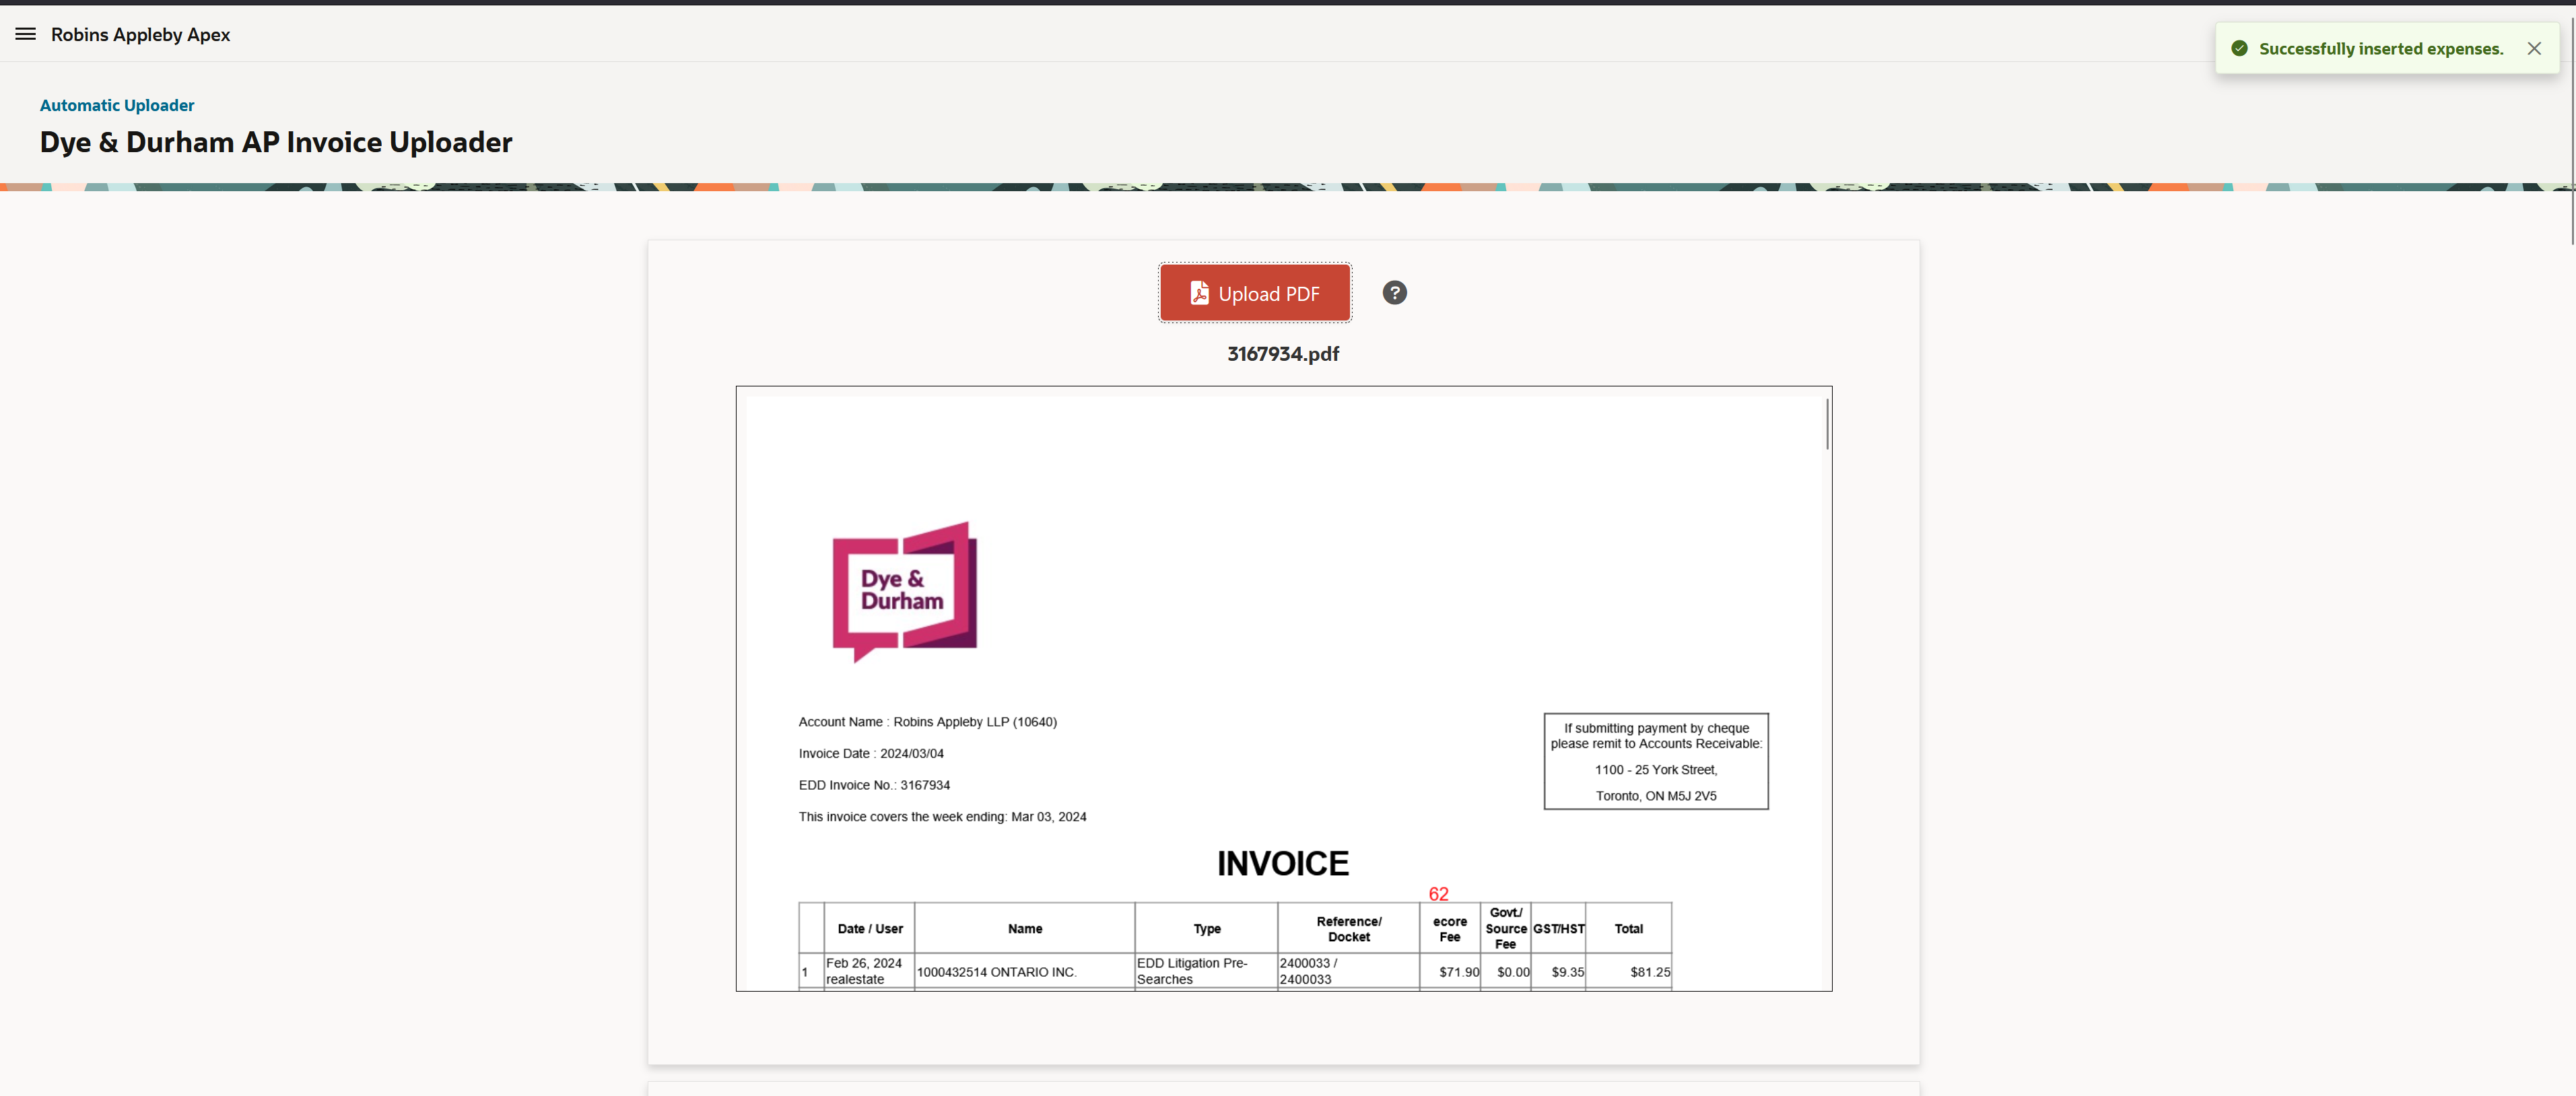
- Wait until you see a green "success" message on the top right as well as a preview of the invoice that you uploaded.
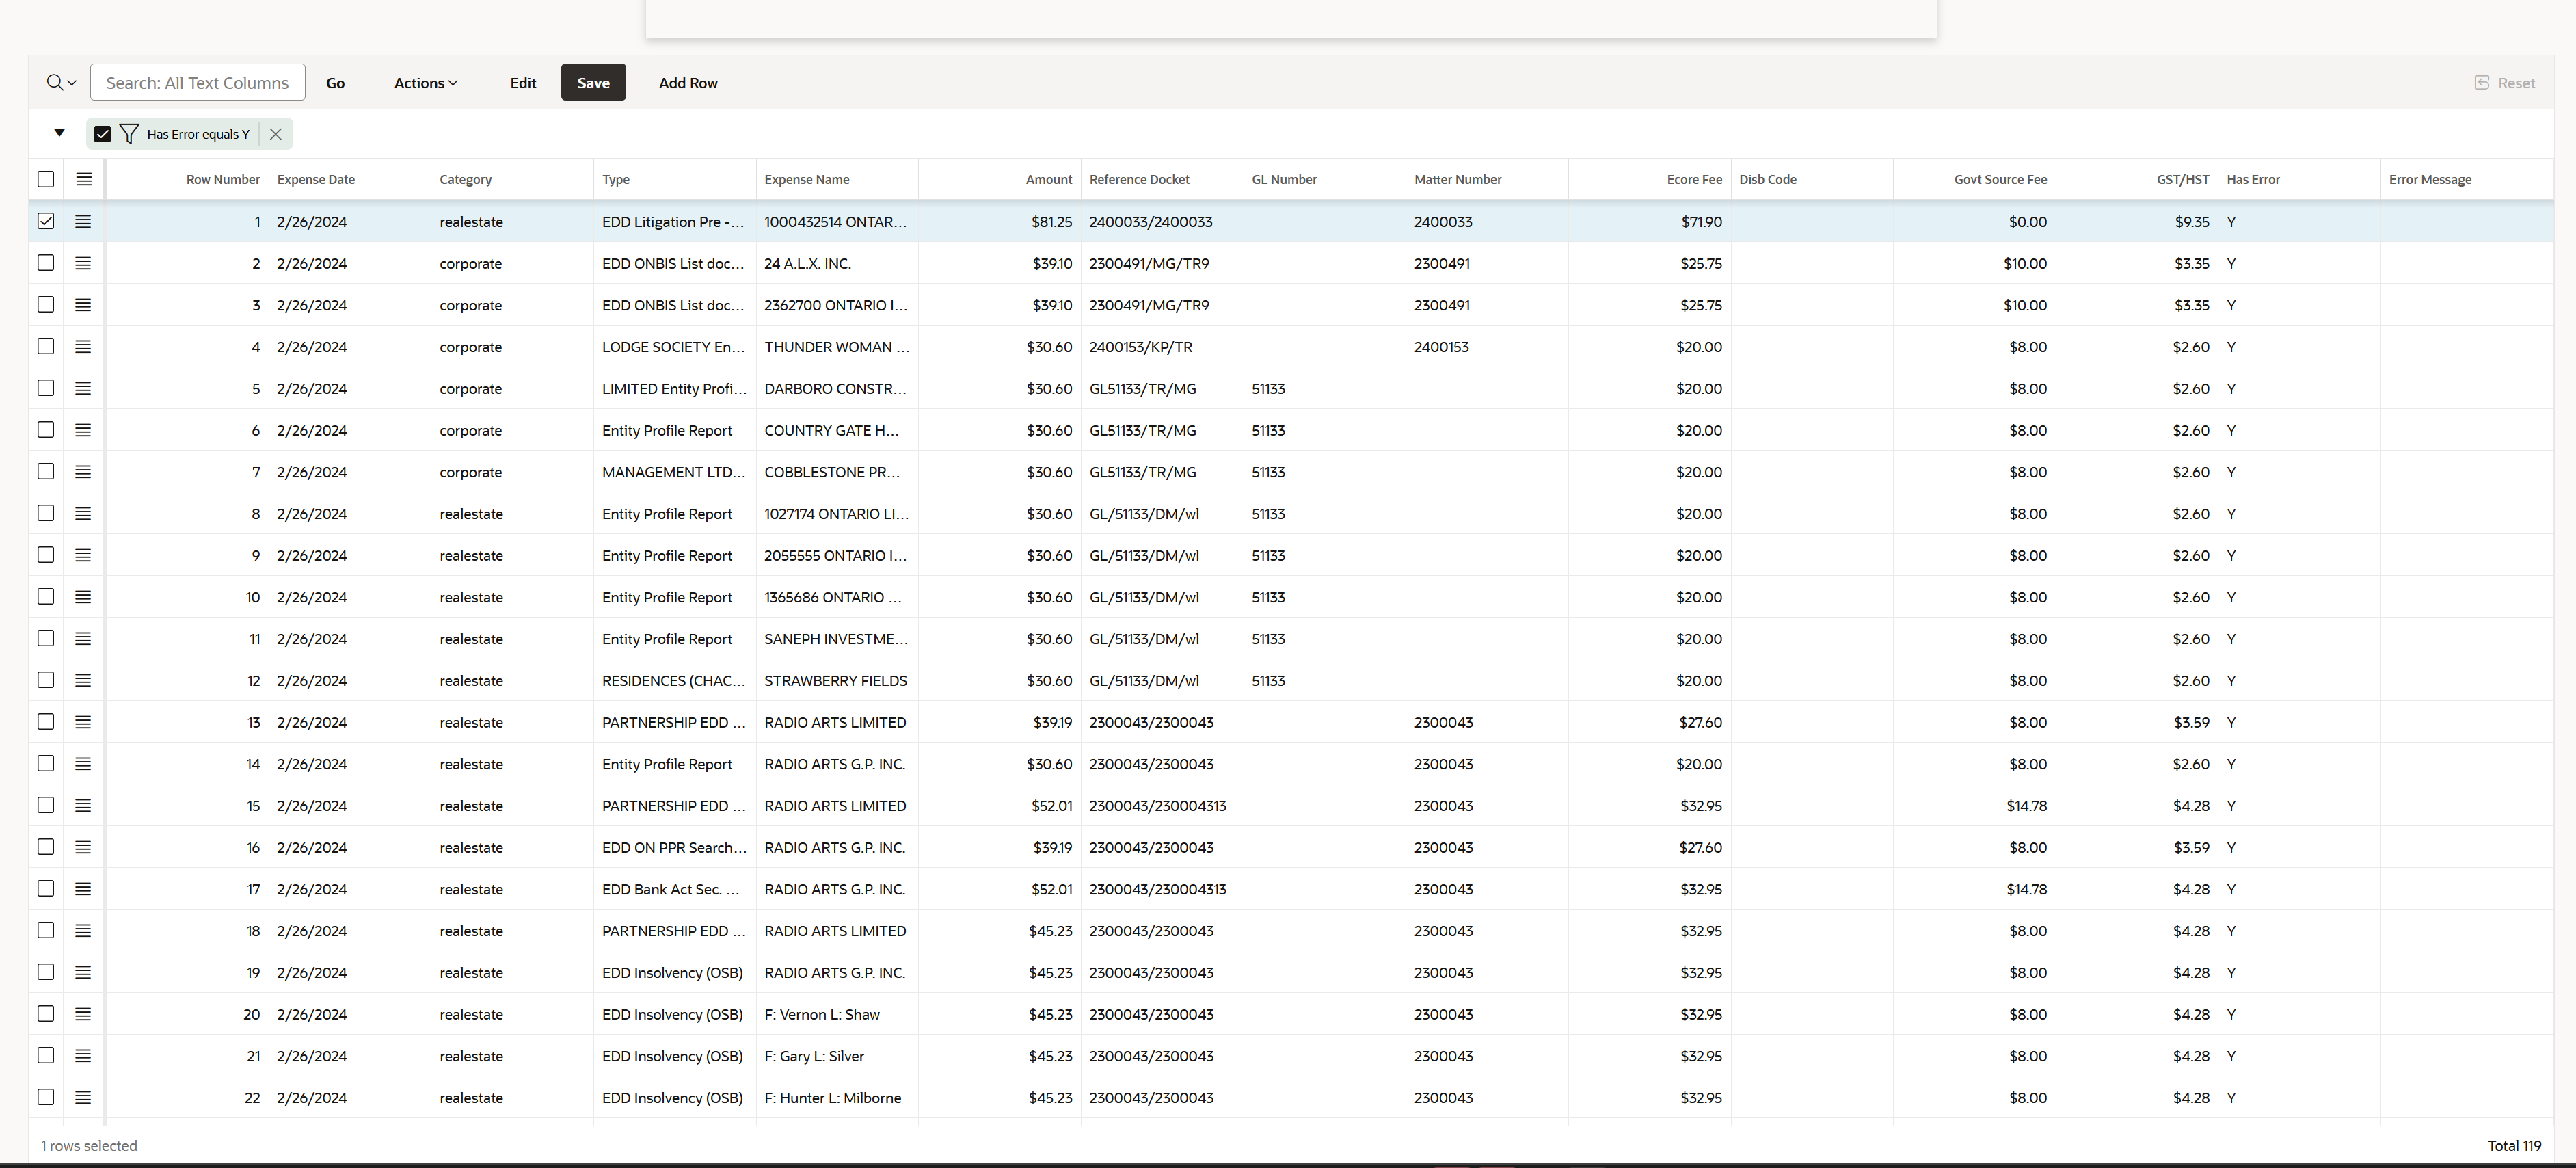
- You will see your expenses populate at the bottom. You can edit them as you wish by double clicking any of the grid boxes
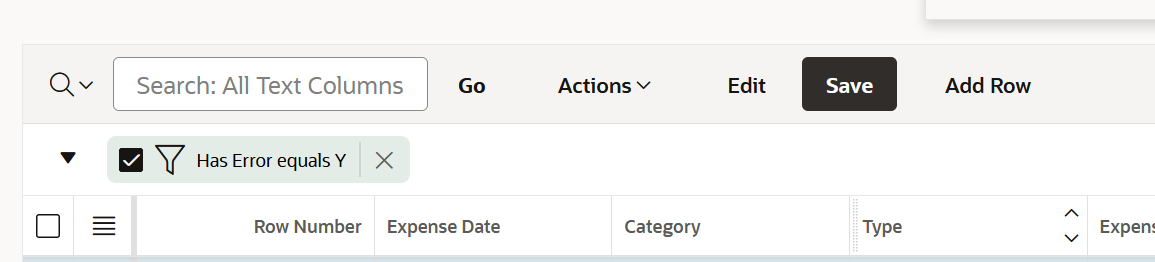
- Any changes you make to the grid boxes, you must click on the "Save" button to save what you have done!
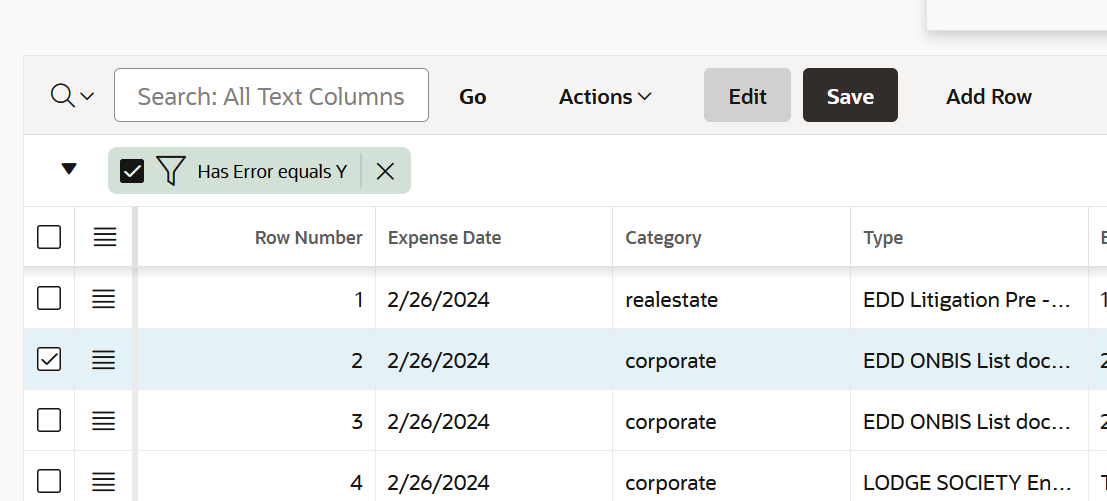
- When you are satisfied with the results and have inputted all the relevant information, you can click on the "Validate" button to validate the expenses. It will refresh the expenses and filter out any expenses that have any potential errors.
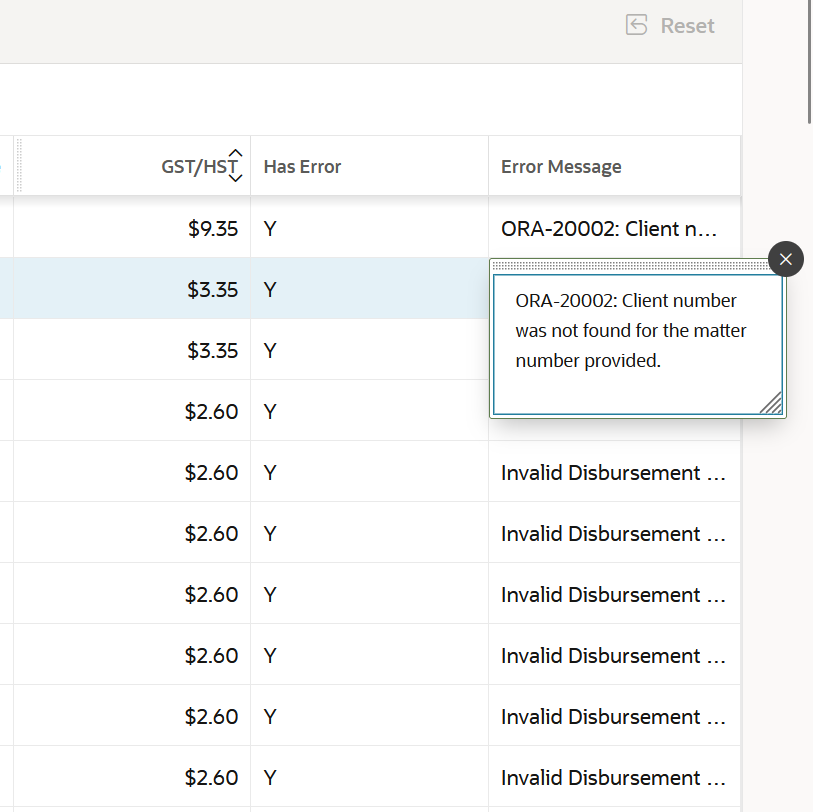
- The error message will be displayed for the corresponding expense.
- Continue to make changes and validate until all errors are gone. You can also see the successful expenses by unchecking the filter at the top right.
- Once everything is validated and there are no more errors, you can click on the "Submit" button. If everything goes through smoothly, then you will get a success message and everything will clear.
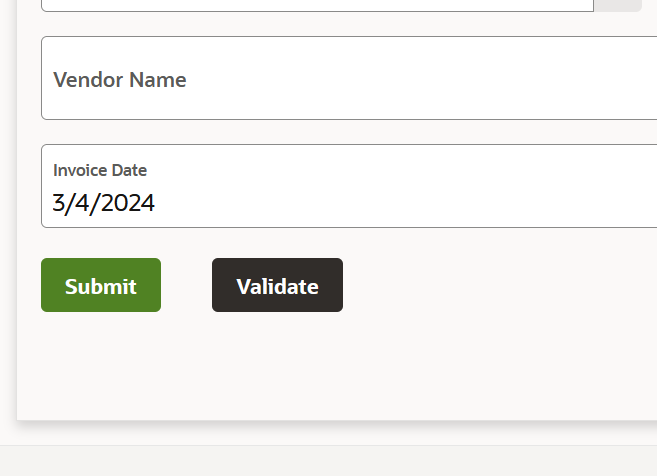
- A journal number will be provided once it goes through.
